Magit (Emacs) as git client
Git commandline had been my go-to way of using git for a long time, till I came across the world of emacs and magit. In this entry, we will set up vanilla emacs with magit.
Emacs is an all in one text editor. Magit is an interface to the version control system Git, implemented as an Emacs package.
Prerequisites
- A cloned git repo in your local machine
- Download vanilla emacs for macos from https://emacsformacosx.com and for other OSes from here.
Magit installation
-
If you are a first time emacs user, create a .emacs file in your root path
touch ~/.emacs -
Copy this snippet into your
.emacsfile to install the straight.el package manager(defvar bootstrap-version) (let ((bootstrap-file (expand-file-name "straight/repos/straight.el/bootstrap.el" user-emacs-directory)) (bootstrap-version 5)) (unless (file-exists-p bootstrap-file) (with-current-buffer (url-retrieve-synchronously "https://raw.githubusercontent.com/raxod502/straight.el/develop/install.el" 'silent 'inhibit-cookies) (goto-char (point-max)) (eval-print-last-sexp))) (load bootstrap-file nil 'nomessage)) -
Append the following line to
.emacsfile after the above snippet to install magit(straight-use-package 'magit) -
To start the installation, type
alt-xand typeeval-buffer
Using Magit
-
Open the emacs GUI - typing
emacsin spotlight search (presscmd + space) should open up. If it doesnt help, just click on Emacs executable. Emacs can be found in this path/usr/local/bin/emacs -
Once inside emacs, type the following
Ctl-x Ctl-f, enter the path of a file in your cloned git repo and press enter- If you find the above step hard, you can just go to the menu bar of emacs and open your file using the GUI
-
The previous step should open up the file, now press
Ctl-x gand voila, you should see the following window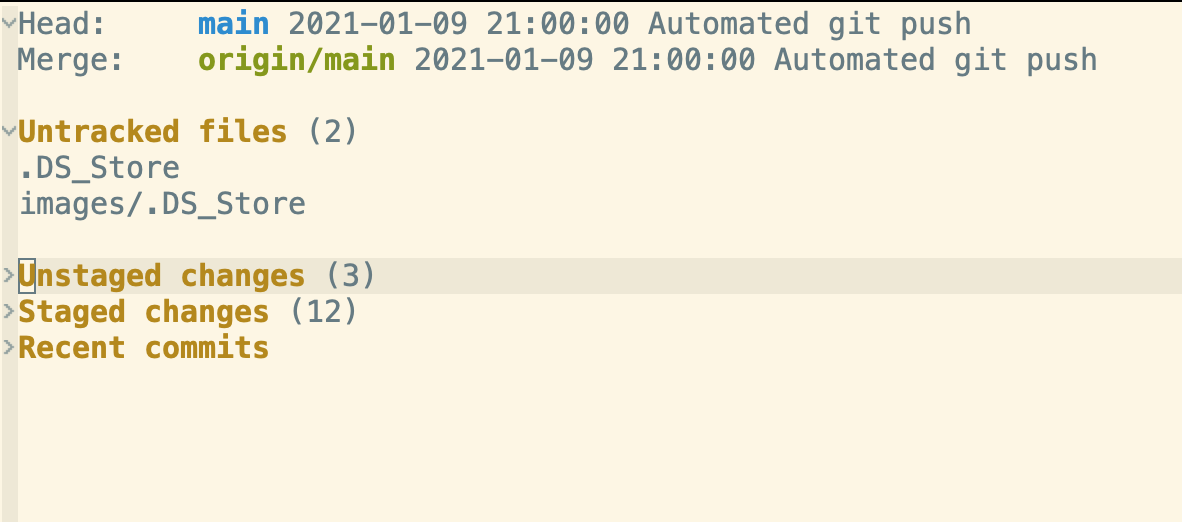
Figure 1: magit first page
-
There are collapsed and uncollapsed sections. Just moving to the section and clicking
tabkey will expand or collapse the section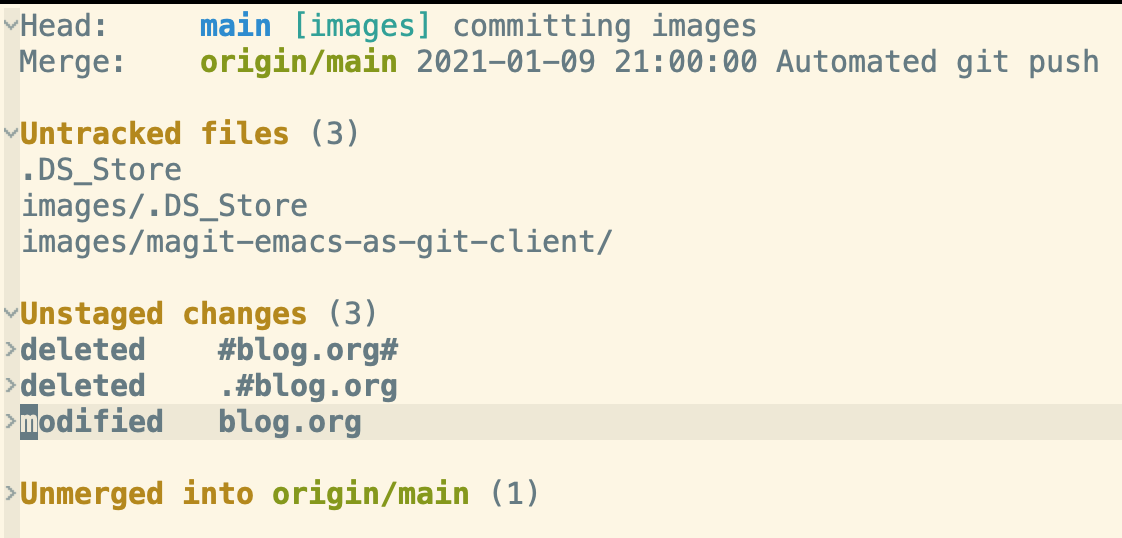
Figure 2: Unstaged section expanded
-
Go to any file listed in the unstaged section and press
tabkey again which will show you the chunks. You can use the following commands on each chunk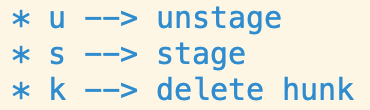
Figure 3: Basic commands
-
To navigate this screen, you can use normal keyboard arrows or mouse. But to get the real speed advantage of emacs you can use the following shortcuts
n- will take you to the next chunk from current positionp- will take you to the previous chunk from current positionCtl + n- will take you to the next linectl + p- will take you to the previous line
-
Once you have staged the right chunks and files by pressing
s, you can pressc, it will open the following screen with all available commit options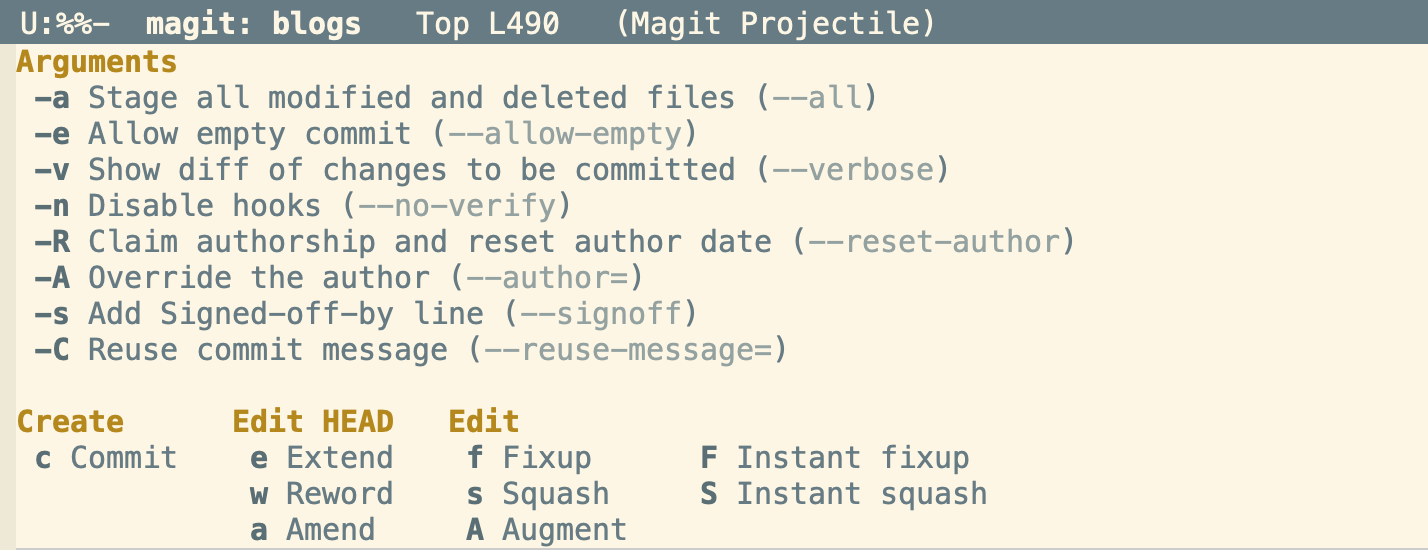
Figure 4: Commit Options
-
Lets just explore basic commit for now, press
cagain, it will open a buffer to type your commit msg -
Press
Ctl-c Ctl-kif you want to abort, or type the commit message and pressCtl-c Ctl-cif you would like to go ahead n commit -
Similar to how
copened the commit options. Pressingshift-p(P) will open the push options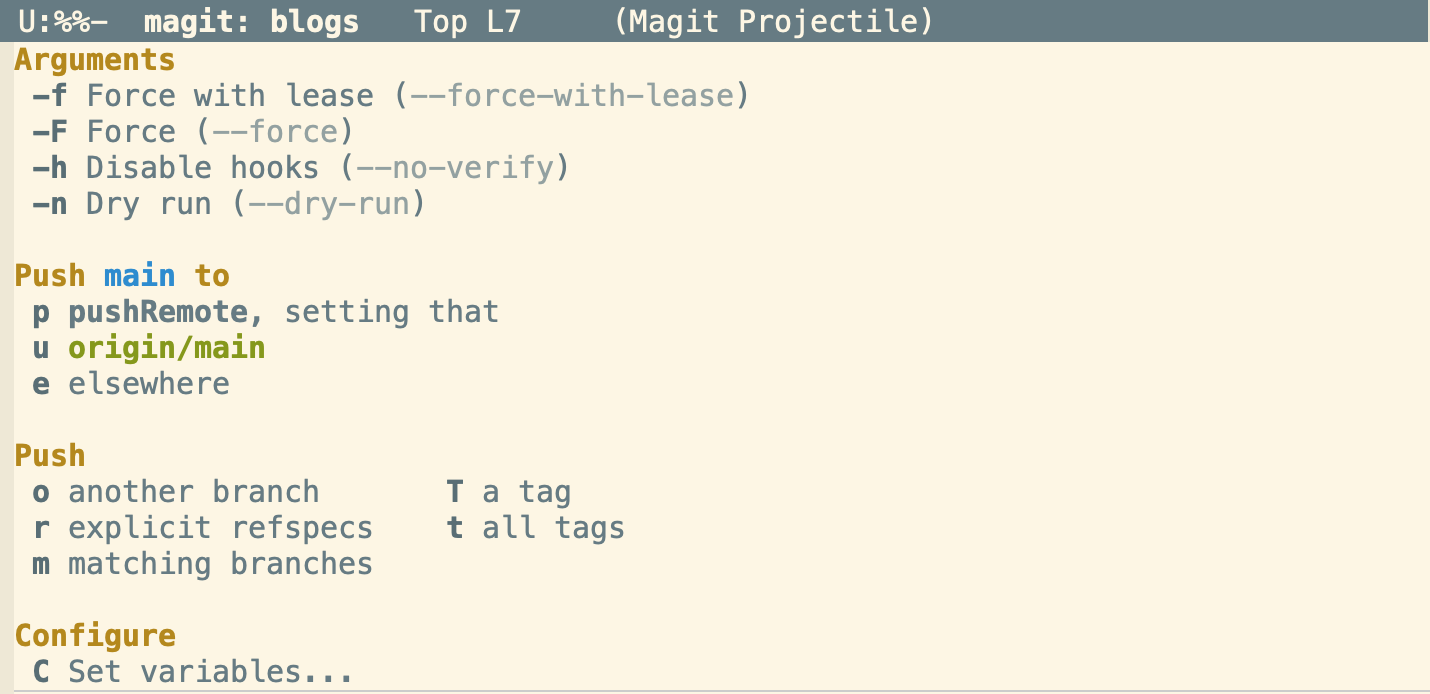
Figure 5: Push Options
-
Pressing
pagain now will push the commit to your repository
If you are completely new to emacs, the inhouse tutorial in emacs can be invoked by typing Ctl-h t which will give you a quick way to learn emacs basics.
At any point, if you have two buffers open in your emacs, place your cursor in the buffer of your choice and press ctl-x 1 to show only that window